
This pair of 6 month old guppies, which are about 2 cm long each, will be the first residents.

They may grow to be 4-5 cm each, and they may have babies.
I use an equation to calculate the minimum size of an aquarium based on the size of the fish.

The walls of my aquarium should be up to 6 mm thick for testing new equipment.
I get 5 mm thick plexiglass (acrylic) sheets.
I use the dull side of a blade to score cutting lines.


Manually sawing the plexiglass along the cut lines works better for me than cutting with a scoring blade.


The cuts come with rough edges.

Here you can see the smooth edge.

And here is the rough edge.
Ideally, all edges should be smooth.

I file rough edges to make them smoother.
The smoother the better.
I would polish it if I had the tools.

Save all shavings for later use.


Here are the front and the back sides.
Here are the bottom and the top.
And here are the right and left sides.
All 6 sides are ready.


A sturdy board covered with paper serves as a working table for gluing my aquarium.

It is better to glue smooth edges.
This is the bottom side.
The smooth edge goes on the front.

This is the front side.

The smooth edge goes to the bottom.

I use sticky tape to secure the sides to each other.

Here I attach the front to the bottom.

Then I attach sides to the front and to the bottom.
The smooth edges of the sides go to the bottom and to the front.

Fix all sides as straight as you can.

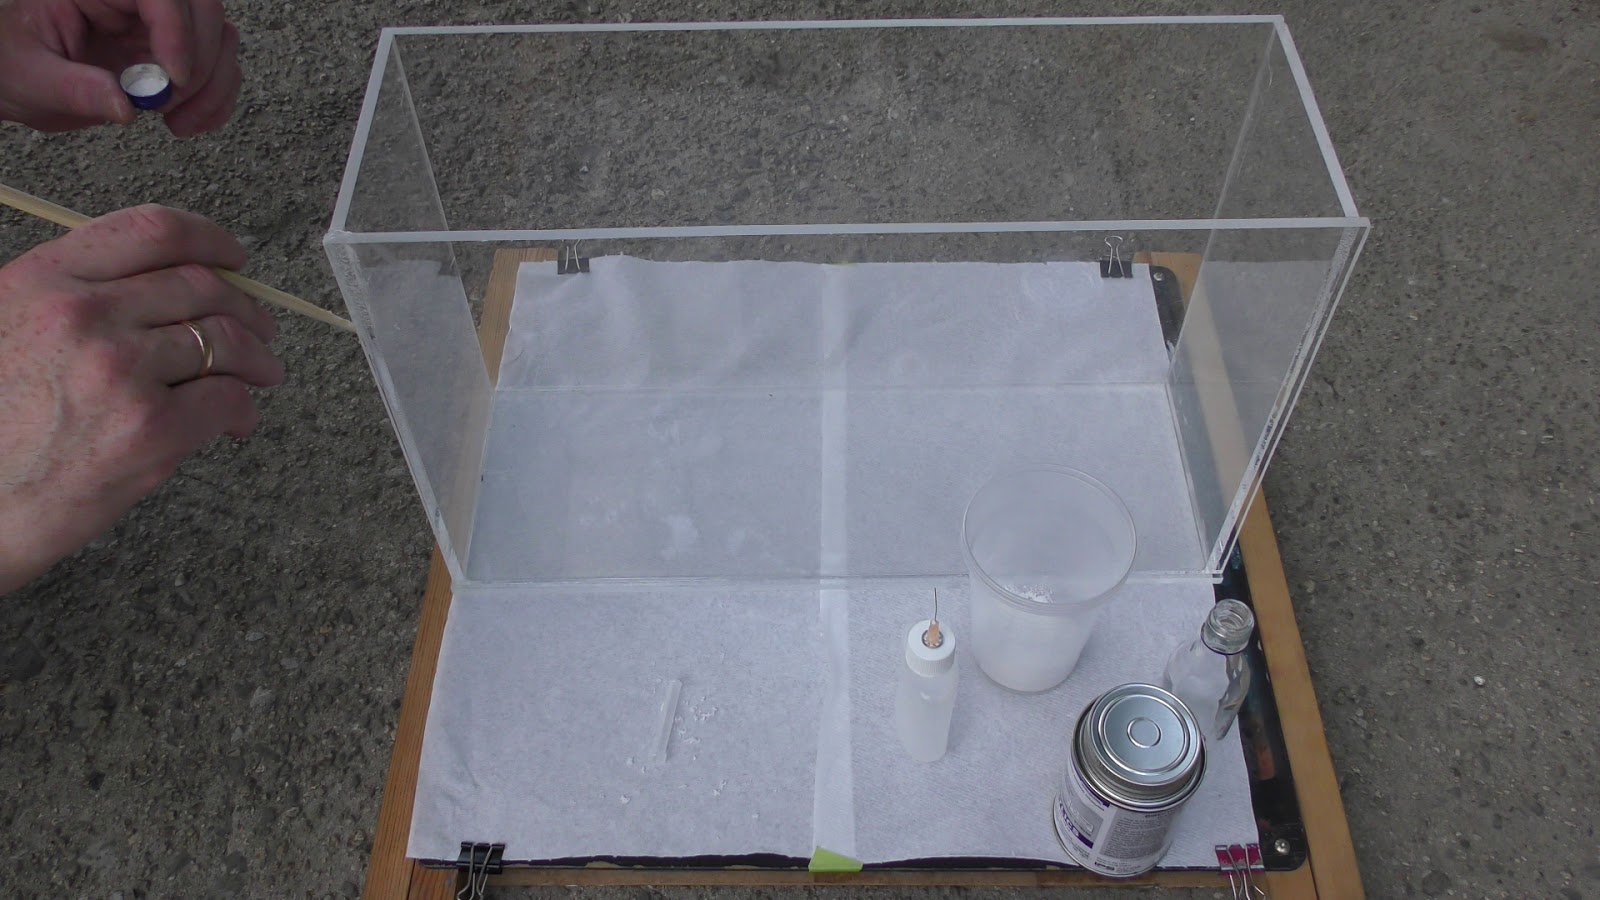
I use acrylic solvent (SCIGRIP 4) known as Weld-on 4 to glue this aquarium.

It is very toxic!
For this reason I am gluing my aquarium outdoors.

Pour some of the solvent in the applicator.

The solvent evaporates very quickly.
Keep the jar closed!

The solvent starts flowing from the needle of the applicator as soon as I point the needle down!

Apply the solvent between the front and the bottom side.

Then apply solvent between the sides and the front and the bottom.
You have 2-3 minutes to readjust the sides before the solvent dries.

After applying solvent from inside of the aquarium I do it from the outside.
Let it dry for a couple minutes.


Use sticky tape to secure the back to the sides and to the bottom.


The smooth edge goes to the bottom.

Apply Weld-on 4 to the joints from inside of the aquarium.

I spotted a gap at the top between the side and the back.
Apply pressure on the joint for a couple minutes.
It may seal the small gap.


I removed all sticky tape about 10 minutes after applying the solvent.
It leaves some marks!
Next time I will not apply the solvent under sticky tape!


I try to seal the gap again.
It does not help!
All other joints seems to be sealed.

The shavings from cutting come handy!

I put a pinch of them in a small tin bottle cap.


Add solvent to cover the shavings.

It dissolves the shavings, making a thick glue.

Apply this glue to the gap.
I used a chopstick to apply the glue, but I should use something thinner.
A toothpick would be better.

Apply the glue from inside and from outside.


I let it dry a couple minutes.
Then apply the solvent to smooth it.

I let the aquarium dry for 24 hours.

Then I fill it up with water to the top.
Let it stay for at least 24 hours.

Look for any leakage.
There was no leakage!

I forgot to make a hole at the top of the back side for an air tube.
That is a mistake I have to fix now.
Empty the aquarium.
Mark a spot for the hole.

I drill the hole on slow speed.


Then I file the edges of the hole.

Fill up the aquarium with gravel and water.
Let it stand for 24 hours to dechlorinate water and check on leakage.

Then add equipment (filters and etc) and plants.
I planted in this aquarium: Peace lily (it grows underwater!), 2 types of moss that grow on streets (it grows underwater too!) and hairgrass.

I choose this pair of guppies born 02/25/2017, measuring about 2 cm each, to be the 1st residents of my new aquarium.


Drain some water from their old aquarium and add it to the new aquarium.


Let it stay overnight to grow old bacteria in the new aquarium.
Add a couple snails for fun.
I populate all my aquariums with seed shrimps, cyclopes, and daphnia.
They keep aquariums clean and fish eat them.


Here is the top (the 6th) side of the aquarium.
It is the same size as the bottom.
I use the solvent to glue 4 small pieces to the inner part of the top to prevent the top from sliding.


The outside dimensions of my fully assembled aquarium: 3840 mm by 134 mm by 243 mm.
Remember the walls are 5 mm thick.
The aquarium filled with water about 15-20 mm to the top.
The capacity of this tank is 3830*124*223=10.5 liters.
This aquarium is about 6-7 times larger than my nurseries where I breed guppies sized 2-3 cm each.


July 15th, 2017
Moving fish into their new home.

I use an aquarium fish net with a custom made round mouth :) to catch fish in bottle aquariums.


Welcome home my little fish!

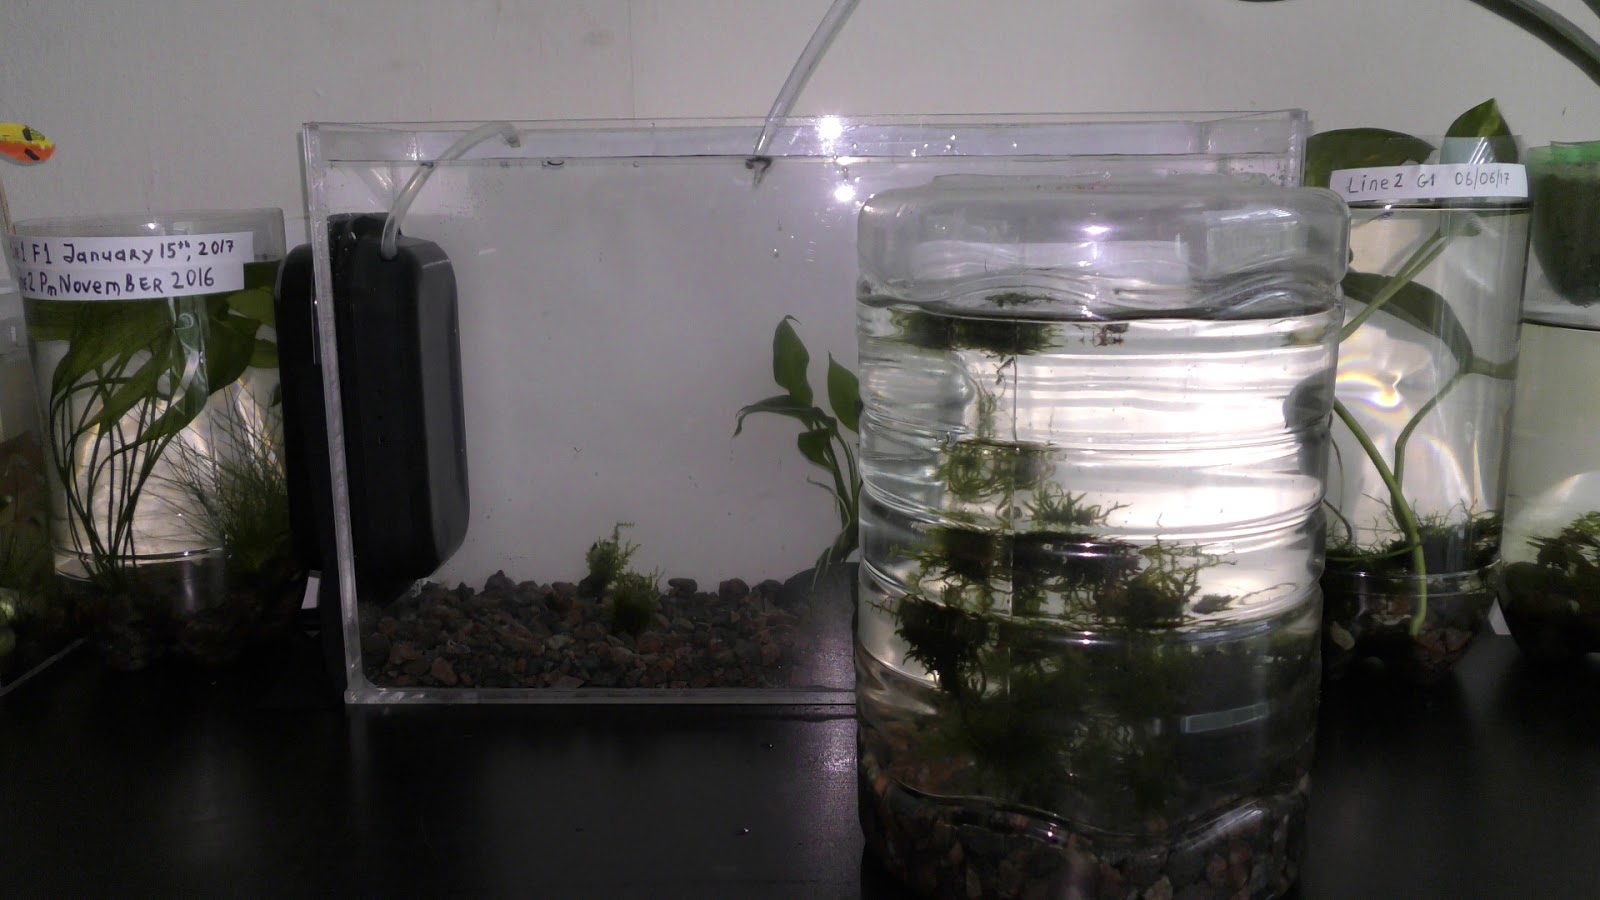
You may notice a black box on the left side of the aquarium.
This box is the HOG.5 algae scrubber.
Words of gratitude to Paola for the idea and special thanks to Bryan from Santa Monica Filtration for providing and allowing me to review my experiments with the algae scrubber.

It is one of my long term projects that you will see in my future videos.
I made the front (and the back) side of this aquarium with proportions of HD or 4k screens.
The entire aquarium fits on HD or 4k screen.
It allows continuous video monitoring necessary for many projects.

The top of the aquarium reduces evaporation and can serve as a shelf for smaller nurseries.
You will see how this aquarium flourishes in coming videos.
Have fun and happy aquarium :)


They may grow to be 4-5 cm each, and they may have babies.
I use an equation to calculate the minimum size of an aquarium based on the size of the fish.

The walls of my aquarium should be up to 6 mm thick for testing new equipment.
I get 5 mm thick plexiglass (acrylic) sheets.
I use the dull side of a blade to score cutting lines.


Manually sawing the plexiglass along the cut lines works better for me than cutting with a scoring blade.


The cuts come with rough edges.

Here you can see the smooth edge.

And here is the rough edge.
Ideally, all edges should be smooth.

I file rough edges to make them smoother.
The smoother the better.
I would polish it if I had the tools.

Save all shavings for later use.


Here are the front and the back sides.
Here are the bottom and the top.
And here are the right and left sides.
All 6 sides are ready.


A sturdy board covered with paper serves as a working table for gluing my aquarium.

It is better to glue smooth edges.
This is the bottom side.
The smooth edge goes on the front.

This is the front side.

The smooth edge goes to the bottom.

I use sticky tape to secure the sides to each other.

Here I attach the front to the bottom.

Then I attach sides to the front and to the bottom.
The smooth edges of the sides go to the bottom and to the front.

Fix all sides as straight as you can.

I use acrylic solvent (SCIGRIP 4) known as Weld-on 4 to glue this aquarium.

It is very toxic!
For this reason I am gluing my aquarium outdoors.

Pour some of the solvent in the applicator.

The solvent evaporates very quickly.
Keep the jar closed!

The solvent starts flowing from the needle of the applicator as soon as I point the needle down!

Apply the solvent between the front and the bottom side.

Then apply solvent between the sides and the front and the bottom.
You have 2-3 minutes to readjust the sides before the solvent dries.

After applying solvent from inside of the aquarium I do it from the outside.
Let it dry for a couple minutes.


Use sticky tape to secure the back to the sides and to the bottom.


The smooth edge goes to the bottom.

Apply Weld-on 4 to the joints from inside of the aquarium.

I spotted a gap at the top between the side and the back.
Apply pressure on the joint for a couple minutes.
It may seal the small gap.


I removed all sticky tape about 10 minutes after applying the solvent.
It leaves some marks!
Next time I will not apply the solvent under sticky tape!


I try to seal the gap again.
It does not help!
All other joints seems to be sealed.

The shavings from cutting come handy!

I put a pinch of them in a small tin bottle cap.


Add solvent to cover the shavings.

It dissolves the shavings, making a thick glue.

Apply this glue to the gap.
I used a chopstick to apply the glue, but I should use something thinner.
A toothpick would be better.

Apply the glue from inside and from outside.

I let it dry a couple minutes.
Then apply the solvent to smooth it.

I let the aquarium dry for 24 hours.

Then I fill it up with water to the top.
Let it stay for at least 24 hours.

Look for any leakage.
There was no leakage!

I forgot to make a hole at the top of the back side for an air tube.
That is a mistake I have to fix now.
Empty the aquarium.
Mark a spot for the hole.

I drill the hole on slow speed.


Then I file the edges of the hole.

Fill up the aquarium with gravel and water.
Let it stand for 24 hours to dechlorinate water and check on leakage.

Then add equipment (filters and etc) and plants.
I planted in this aquarium: Peace lily (it grows underwater!), 2 types of moss that grow on streets (it grows underwater too!) and hairgrass.

I choose this pair of guppies born 02/25/2017, measuring about 2 cm each, to be the 1st residents of my new aquarium.


Drain some water from their old aquarium and add it to the new aquarium.


Let it stay overnight to grow old bacteria in the new aquarium.
Add a couple snails for fun.
I populate all my aquariums with seed shrimps, cyclopes, and daphnia.
They keep aquariums clean and fish eat them.

Here is the top (the 6th) side of the aquarium.
It is the same size as the bottom.
I use the solvent to glue 4 small pieces to the inner part of the top to prevent the top from sliding.


The outside dimensions of my fully assembled aquarium: 3840 mm by 134 mm by 243 mm.
Remember the walls are 5 mm thick.
The aquarium filled with water about 15-20 mm to the top.
The capacity of this tank is 3830*124*223=10.5 liters.
This aquarium is about 6-7 times larger than my nurseries where I breed guppies sized 2-3 cm each.


July 15th, 2017
Moving fish into their new home.

I use an aquarium fish net with a custom made round mouth :) to catch fish in bottle aquariums.


Welcome home my little fish!

You may notice a black box on the left side of the aquarium.
This box is the HOG.5 algae scrubber.
Words of gratitude to Paola for the idea and special thanks to Bryan from Santa Monica Filtration for providing and allowing me to review my experiments with the algae scrubber.

It is one of my long term projects that you will see in my future videos.
I made the front (and the back) side of this aquarium with proportions of HD or 4k screens.
The entire aquarium fits on HD or 4k screen.
It allows continuous video monitoring necessary for many projects.

The top of the aquarium reduces evaporation and can serve as a shelf for smaller nurseries.
You will see how this aquarium flourishes in coming videos.
Have fun and happy aquarium :)

No comments:
Post a Comment