

Remove all stickers from the bottles.

Use a sharp knife to cut off the top part of both bottles.


Cut off the bottom part of one bottle to make a cylinder.


Use scissors to trim off cut edges if necessary.

Use the top part of one bottle to make a cover.
I make a cover similar to the one in the "Plastic Bottle Aquarium DIY" video.


Covers reduce evaporation greatly.
Adding 1/10 of the water weekly in your aquarium adds up to a volume of 5 times your aquarium of drinkable water waste annually!
I cover all my aquariums.

Use the cylinder to make an inner/ doubled wall.
Cut the cylinder length-wise.


Insert the cylinder into the aquarium.

Spread the cylinder to fit along the aquarium walls.

Overlap and hold the cut edges of cylinder in the most fitted position.

Hold and pull the cylinder out of the aquarium.


Use sticky tape to secure the top overlapping edges of the cylinder.


Use another piece of sticky tape to secure the bottom overlapped edges of the cylinder.


Put the cylinder into the aquarium to check if it fits in.


Pull the cylinder out.
Flip it over and check it again.
The cylinder should fit in without you applying much force either way you put it in.


Pull the cylinder out.

Use an awl or thick needle with a handle to make holes in the overlapped parts of the cylinder.
Make each hole through both layers.

Place holes about 1-2 cm or less apart.
Larger space may get fish accidentally sucked between the holes during re-installation.
I learnt it the hard way.

Thread a fishing line through all holes.
I thread the line through each hole first going in one direction and then do it again going in opposite direction.


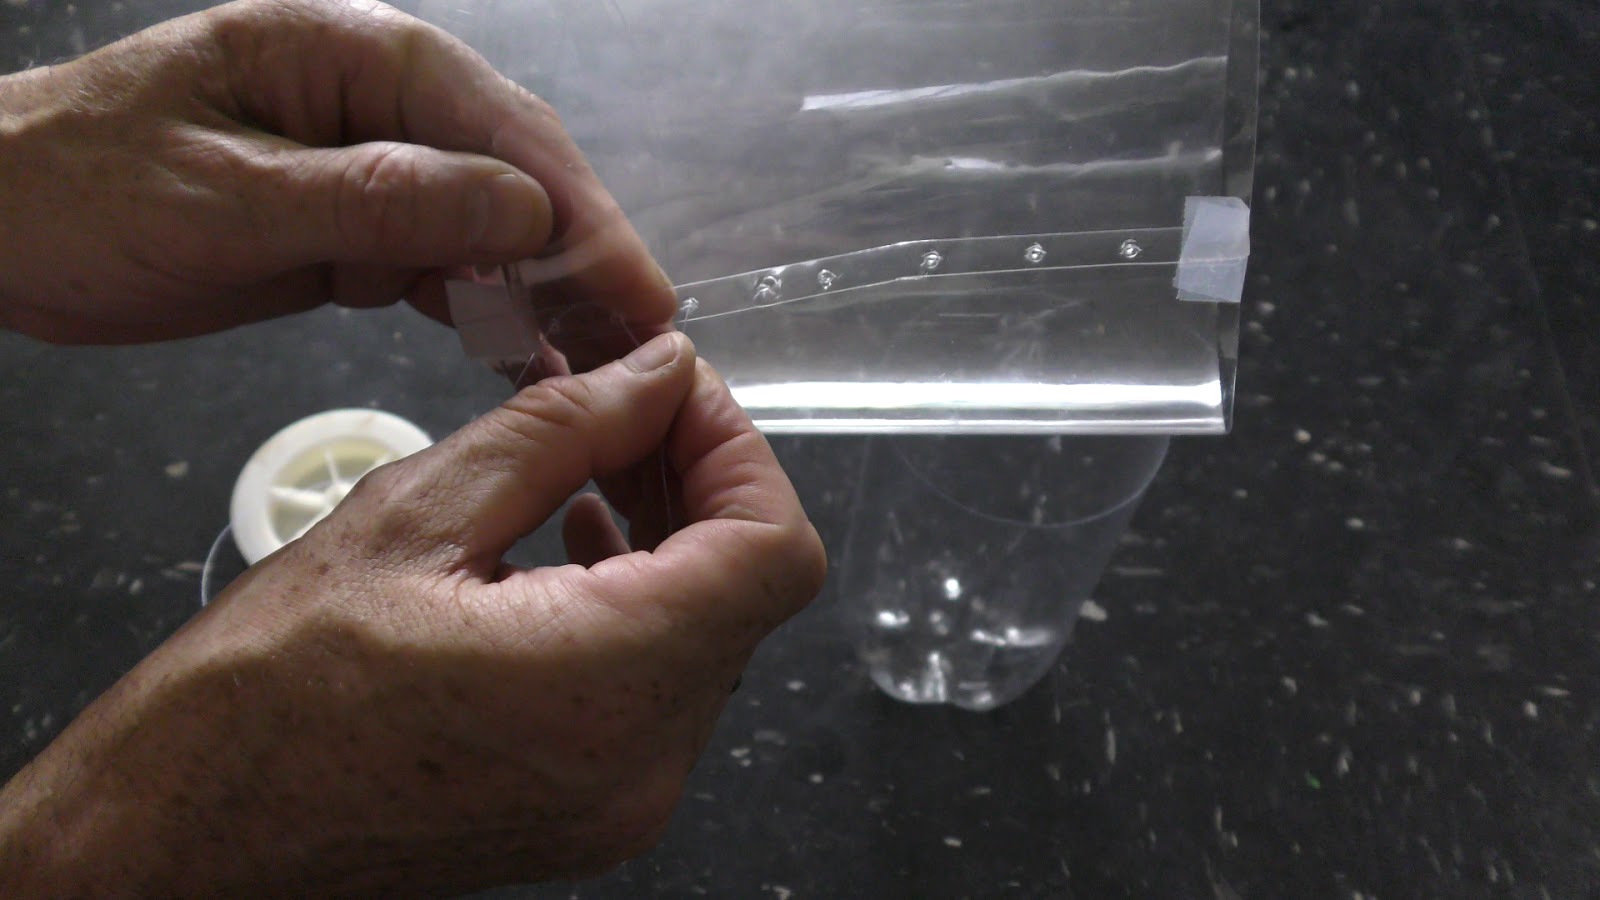

Here is closeup on the first go.

And now I am going in the opposite direction tightening each stitch.

The seam looks the same on the inside and outside of the cylinder.


Cut off the fishing line.

Remove the sticky tape.

Tie off the ends of line.
I make a couple overhand knots.

Trim the ends of fishing line.

Check again for the cylinder to fit either way in the aquarium.


Trim the top edge of the cylinder to make it fit fully inside of the aquarium.
Otherwise the capillary force would make water leak over the aquarium brim.

Here I make the inner wall about 1 cm shorter.


Usually I add dechlorinated water with plants first and then weeks later I add fish.

In this example, I add gravel.

Then I add water from an old aquarium.


Notice, the old aquarium looks green, but the water is actually clear :)

You can see the clear water in the new aquarium.

Now I move the underwater growing land moss from the old aquarium to the new one.


Also, I transfer a couple Hairgrass plants to the new aquarium.

I don't change water in all my aquariums since the end of 2016.
Check links in description to the video for more details on my aquarium fish care routines.
Now I transfer my guppies to the new aquarium.


Then I move the rest of the water using a pipette.

I populate all my aquariums with freshwater snails and seed shrimps.


Seed shrimps love algae.


Cover the aquarium.

The new double walled bottle aquarium is all set!

Depending on your aquarium care, it takes weeks or months for algae to build up on the inner wall of the aquarium.
Then I would pull the inner wall out, clean it up and re-install it back without making any mess in the aquarium.
Simple and fast!

Have fun and happy aquariums :)
No comments:
Post a Comment