It fits on standard A4 page.
It has 100 sections (numbers).
Here is the same template without numbers.
Get a sturdy cardboard or plastic board the size of the template.
Glue the template to the board using appropriate glue.
I am using a regular glue stick in this example.
Apply an even layer of the glue onto the board's surface.
Put the template on the board nicely.
Use a sponge or cloth to remove any air pockets.
Let the glue dry under a weight load to keep the board flat.
I let the glue dry for 24 hours.
The cardboard comes out flat.
Test cutting tools on the edge of the board.
I tried scissors and a box cutter with thin blade.
The box cutter works better for me.
Cut neatly along template lines.
With so many cuts to make, it is hard work to do.
Here is my cut out board.
I use a wooden plank to make a base for the spinner.
Make the base about 6 cm longer than the diameter of the spinner.
Smooth the edges of the base with a file and sandpaper.
Chose an appropriate sized pin for the spinner.
It could be a nail, a screw, or a bolt.
Also, get a couple of washers.
A plastic bottle cap makes a good washer for this purpose.
Drill a hole in the center of the spinner board.
I make a hole with a drill bit about 1-2 mm smaller than the diameter of the screw.
Use a sharp blade to clean the edge of the hole.
Mark the center of the base.
Use the same drill bit to make a hole through the center of the base.
Use the sandpaper to clean the edges of the hole.
Use the sharp blade to remove all hangnails from the plastic bottle cap.
Use the same drill bit to make a hole through the center of the cap.
Put a washer on a pin (I use 3 washers in this example).
Then put the spinner on the pin.
Then put the plastic cap on the pin.
Screw the pin to the base.
You have to add more washers or cut off any protruding part of the pin from the back of the base.
Spin the spinner to check it.
Adjust the screw as necessary.
I use a plastic metro card to make a stopper.
First I try it to see if it stops the spinner.
Fold the card in half.
Cut half the length of the fold.
Fold the loose half inside of the first fold.
Cut about 5 mm of the bottom corner of the stopper.
Use sticky tape to secure the stopper to the base.
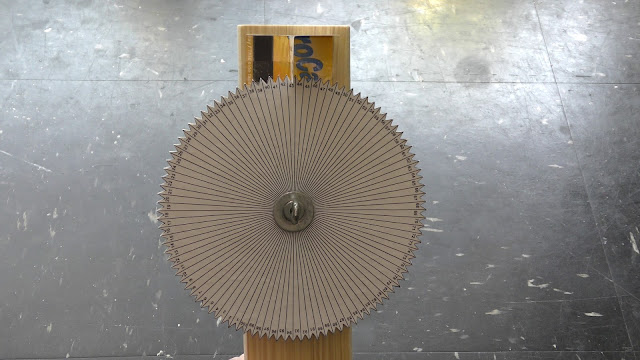
We have made the spinner!
It works in horizontal or vertical position.
You can spin it in any direction (clockwise or counterclockwise).
The best part - my kid uses it to play his MLB table game!
Have fun and happy spin :)


No comments:
Post a Comment